|
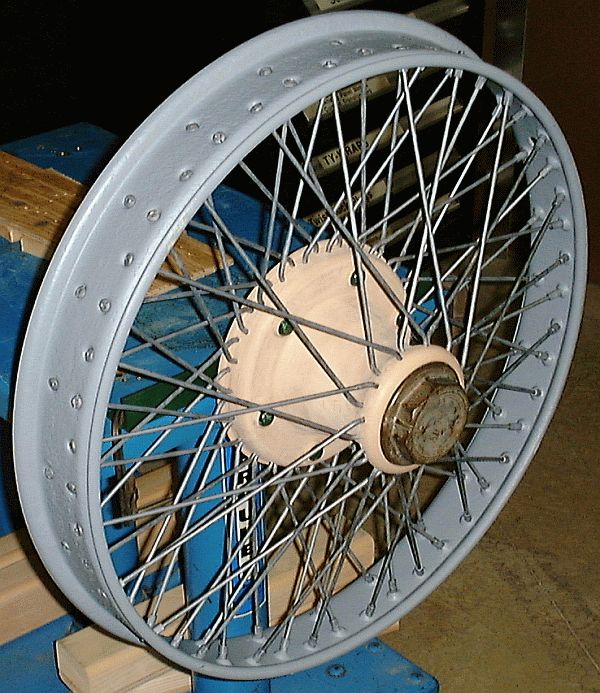
After all the spokes were in place they must be tightened and the wheel trued. In order to accomplish this a means to easily rotate the wheel is necessary. Mounting the wheel back on the front axle of the car would work but is also a bit difficult. A front axle for a Stanley was available so it was purchased for several reasons. As pictured above the axle would provide a wheel hub for truing the wire wheels and later painting them. The axle could also be a source of parts (especially bearings for the wheels, king pins, etc) should the need ever occur. In the photograph above the wheel hub was mounted to an angle that could be clamped in a vice or to a steel table as shown. With the wire wheel mounted it would be possible to rotate the wheel for truing and later for painting. The hub also served as the template for the repairs that were made to the wire wheel hubs where the holes had become ovaled.
The above photograph shows a wheel fully trued. Each ferrule was removed from the spoke and both the threads of the spoke as well as the threads of the ferrule coated with Never-Seize. Application of the Never-Seize was to insure the ferrules don't rust onto the spokes. This should allow for tightening of the spokes later if necessary. Once each of the ferrules were finger-tight an index finger was mounted to the table and a pointer positioned at the inside flange of the rim. As the wheel was rotated how out-of-true (side-to-side motion as well as up and down motion of the rim to the index pointer) the wheel was could be determined. Through loosening and tightening of spokes the wheel was brought into being true. Next each spoke was tightened 1/2-turn and the wheel checked for true. This process was continued until all the spokes were tight.
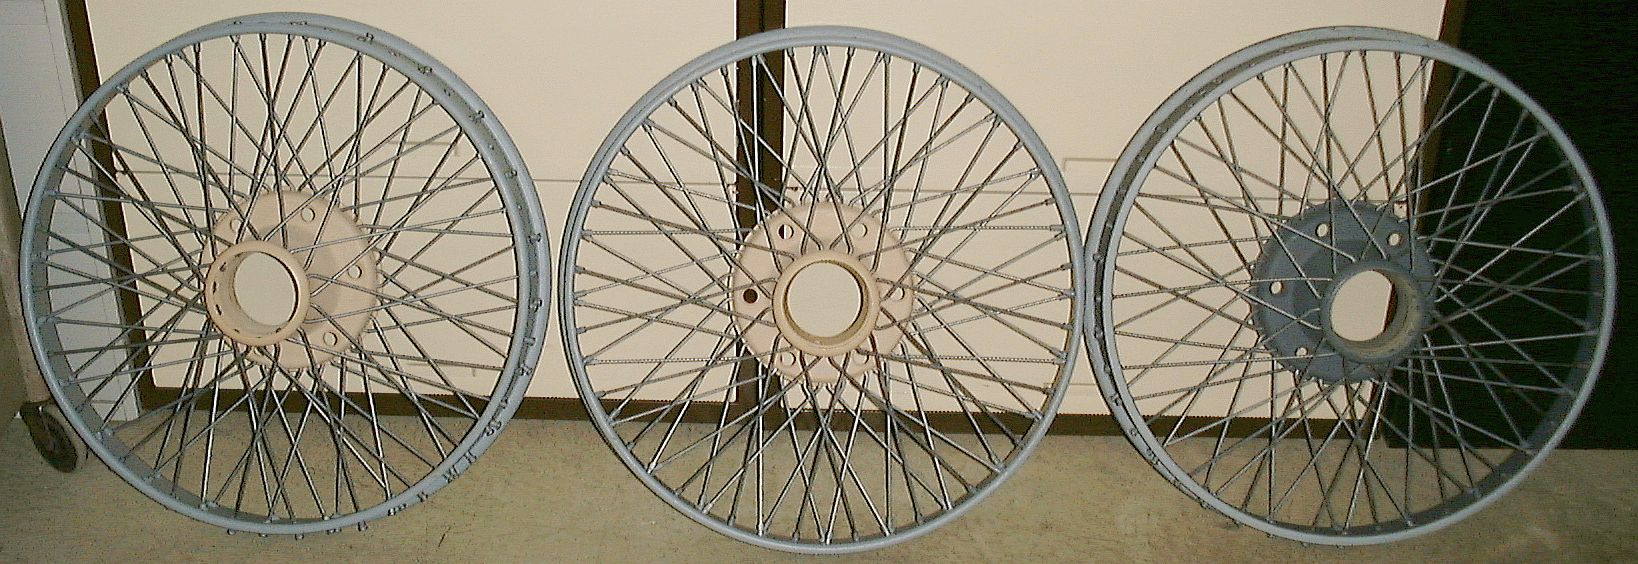
An interesting thing happened during the respoking process. The process was started by sacrificing one of the wheels to provide spokes samples for ordering new spokes. It was also the wheel with the most restoration needed. And when the new spokes were received it was the first wheel respoked to serve as the template for the remaining four. It is the wheel pictured to the right above. The color difference of the hub is due to the primers used to undercoat the steel. When spoking of the remaining group of four wheels commenced the first wheel immediately revealed a problem. The initial spoke pattern (step one in the previous panel) didn't match the wheel serving as the template. After a long investigation it was discovered that there are actually three spoke patterns of the wire wheels! I had selected a hub and rim of differing spoke pattern than the "sample wheel" to work on. To complicate matters the sample wheel that I had spoked was different from the remaining four as well! Before spoking could start on the four remaining wheels the center hubs and outer rims had to be properly matched up! If you are interested in trying to figure out what the different spoke patterns are, click on the photograph above and a full-size version will be displayed in a new window. Depending on your browser's settings you may need to select the "view full size" mode to display the photo in it's 1638 x 564 pixel size. If you can't figure out the difference in spoke patterns, click here for the answer. |